How To Remove A Pfister Bathroom Faucet
Hey there, we're sorry to hear that you're having issues with your Pfister faucet. We know it's frustrating when something doesn't work how it's supposed to, but the good news is that there may be an easy fix to get you back up and running.
Review the information below and follow the links to find your specific model if you need to figure out what parts you need to order. And if at any point you feel lost, don't hesitate to contact our customer service reps to help walk you through it.
Uninstall Faucet or Remove Quick Connector
Problem: I need help uninstalling my faucet and/or removing a quick-connector
Solution: Get to the Right Resource
Our faucets are pretty simple to uninstall, but we've made them for a long time so connections and methods can vary a little. The best information in this area is found in the instruction manuals and maintenance care guides written specifically for each model. You can use our faucet finder below to locate yours and then go to the resources located on that page. We've included some generic steps below that cover more recent designs for our widespread faucets to get you started.
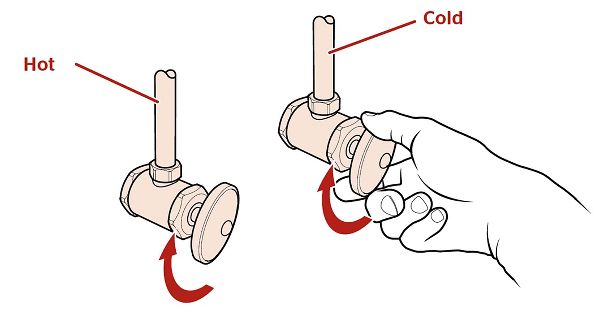
Turn Off Water
Let's start by turning off the water supply to your faucet.
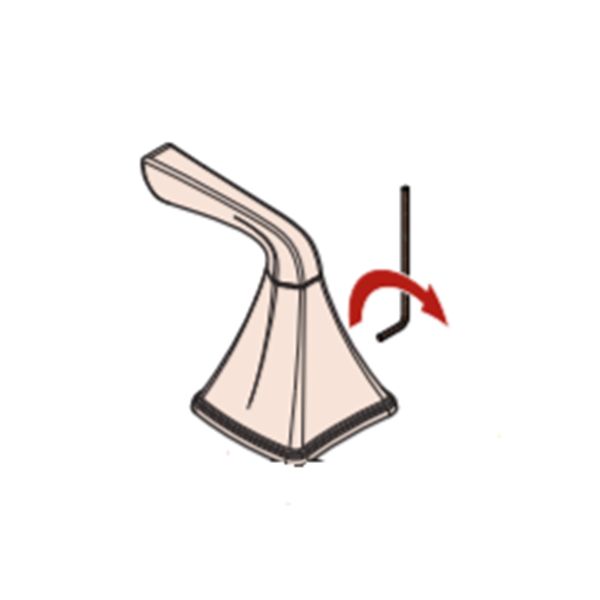
Remove The Handle (set screw)
There are two ways to remove your handle, depending on how it was manufactured. If you feel a hole behind the handle at the base, you have a set-screw design. Use a 3/32'' allen wrench to loosen the set screw and remove the handle.
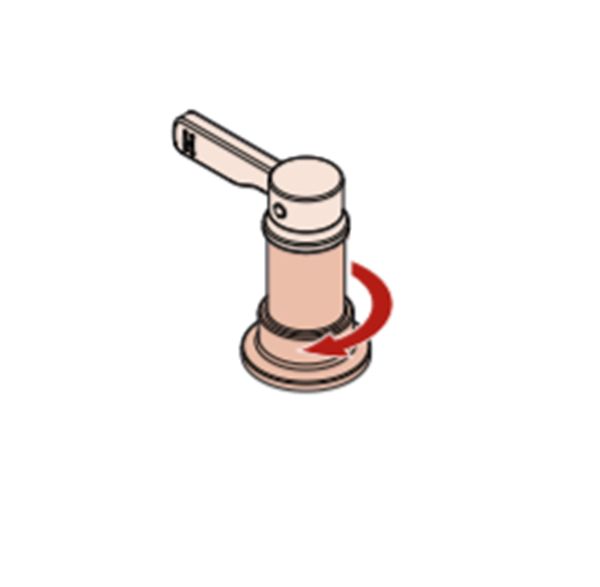
Removing Handle Hub
If there is no set screw hole, your handle will simply twist off. Remove the handle hub by turning the handle hub (or base) counter clockwise.
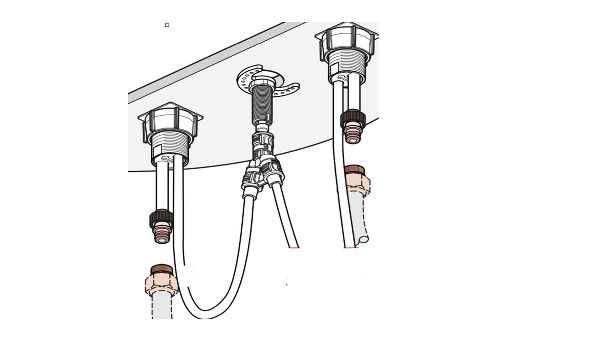
Disconnect Supply Lines
Move underneath the counter and start by disconnecting the supply lines from each valve body (the part that holds the cartridge and handle). It's good to have a bucket handy as they usually have residual water in them. Remove with an adjustable or open face wrench.
Removing handle mounting hardware
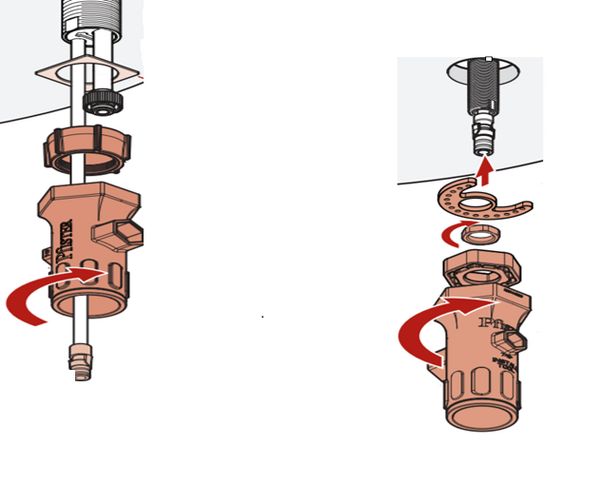
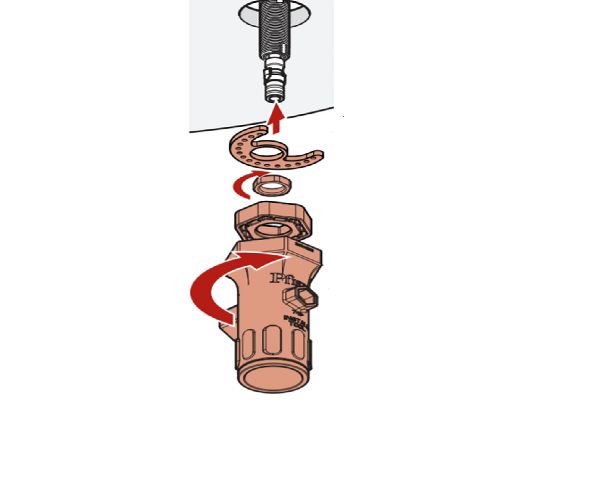
Next, remove the mounting hardware that secures each valve body to the counter top. There are two common types pictured at right. We're showing the installation tool that came with your faucet, but if you're like us and your junk drawer is a lost cause or you neglected to save the tool, you can also use an adjustable wrench or channel locks.
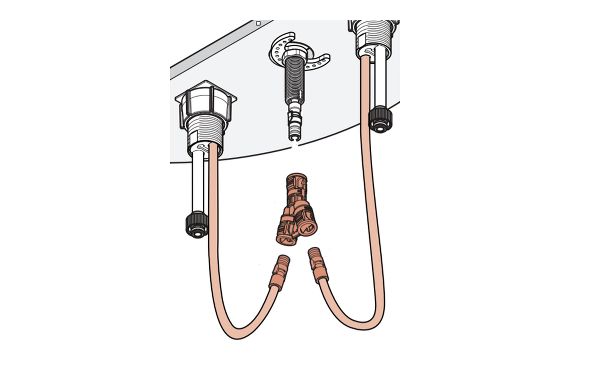
Removing the quick-connect
The connection between the valve bodies and the spout are quick connects - no tools required. Located the Y shaped piece in the center of the connection. Start at the bottom end where the two supply lines are connected. Remove each by pressing on the colored tabs and pulling on the hose. To remove the Y shaped connector from the spout, press up slightly on the entire piece (up towards the bottom of the counter) and then pull down on the colored ring at the top of the Y while pulling the entire piece back towards the bottom of the cabinet. This is a compression connection. By pushing up on the piece, you relieve tension and allow for the colored ring to disengage the piece.
Remove spout mounting hardware
After removing the quick connect on the spout, remove the mounting hardware by using the Pfister installation tool or adjustable wrench and turning counter clock-wise.
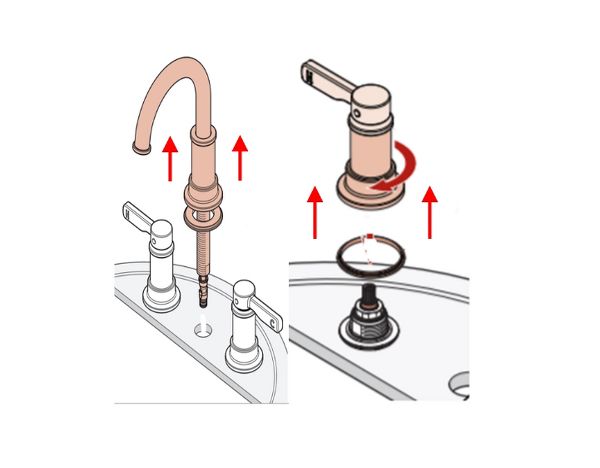
Remove product from the deck
After all lines and mounting hardware have been removed, you'll be able to lift the spout and valve bodies directly up from the counter.
How To Remove A Pfister Bathroom Faucet
Source: https://www.pfisterfaucets.com/parts-support/troubleshooting/support-articles/need-help-uninstalling-faucet-removing-quick-connector


Tidak ada komentar: